If the tire has a large cut or is otherwise severely damaged, you will need to have the vehicle towed. If the tire only has a small puncture, from a nail for instance (do not remove the nail), you can use the temporary tire repair kit so that you can drive to the nearest service station for a more permanent repair.
- Park the vehicle on a firm, level and non-slippery surface, and apply the parking brake.
- Change the gear position to Park (P).
- Turn the hazard warning lights and set the power mode to VEHICLE OFF (LOCK).
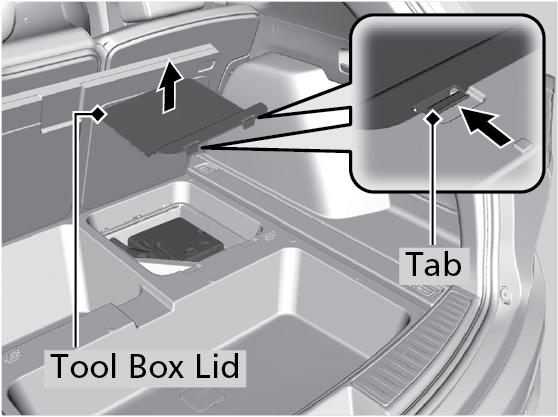
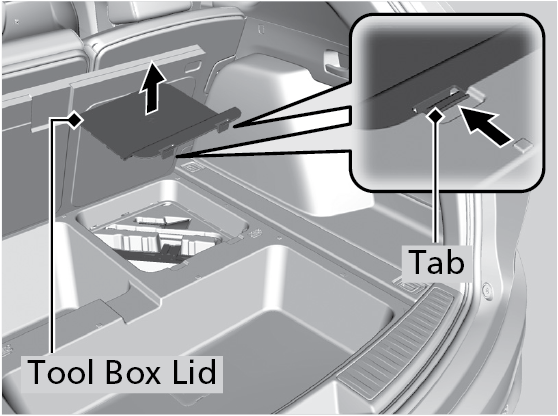
- Push the rear edge of the handle on the floor lid and open the lid.

- Push the tabs to open the tool box lid.
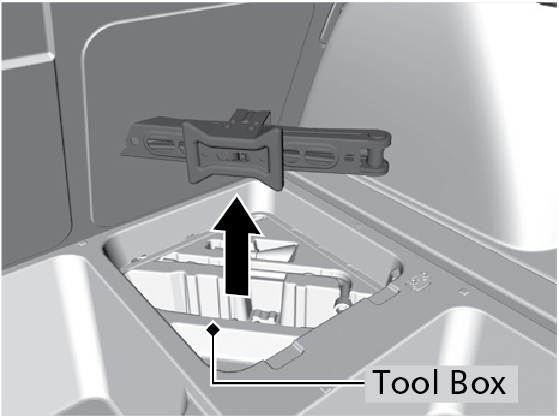
- Take the kit out of the case.
- Place the kit face up, on flat ground near the flat tire, and away from traffic. Do not place the kit on its side.
Injecting Sealant and Air
- Remove the valve cap from the tire valve stem.
- Remove the sealant/air hose from the packaging.
- Attach the sealant/air hose onto the tire valve stem. Screw it until it is tight.
- Plug in the compressor to the accessory power socket.
- Start the engine. Keep the engine running while injecting sealant and air.
- Turn the selector switch to REPAIR (for U.S. models) or SEALANT/AIR or PRODUIT ANTIFUITE/AIR (for Canadian models).
- Press the inflator switch to turn on the compressor
- Models with 235/55R19 101H tires: 255/45R20 101V tires: After the air pressure reaches 33 psi (230 kPa), turn off the kit.
- Models with225/45R20 101V tires: After the air pressure reaches 36 psi (250 kPa), turn off the kit.
- Unplug the power plug from the accessory power socket.
- Unscrew the sealant/air hose from the tire valve stem. Reinstall the valve cap.
- Press the pressure relief button until the gauge returns to (0 kPa).
- Apply the repair notification label to the flat surface of the wheel.

If accidentally swallowed, do not induce vomiting.
Drink plenty of water and get medical attention immediately.
For skin or eye contact, flush with cool water and get medical attention if necessary.
Breathing this colorless, odorless gas can cause unconsciousness and even death.
Only run the engine to power the air compressor with the vehicle outdoors.
Getting Ready to Replace the Flat Tire
-
Push the rear edge of the handle on the cargo floor lid and open the lid.

- Push the tabs to open the tool box lid.Unscrew the spare tire bolt and slide the tire to the rear of the vehicle. Remove the spare tire from vehicle.
-
Take the jack, wheel nut wrench, and jack handle bar out of the tool box.
-
Remove the cover
and the rubber plug on the cargo area lining to access the shaft for the spare
tire hoist. Put the wheel nut wrench with the jack handle bar on the hoist shaft. Turn the wrench to the left to lower the spare
tire to the ground.

- Keep turning the wheel nut wrench to crate slack in the cable. Remove the bracket from the spare tire.
-
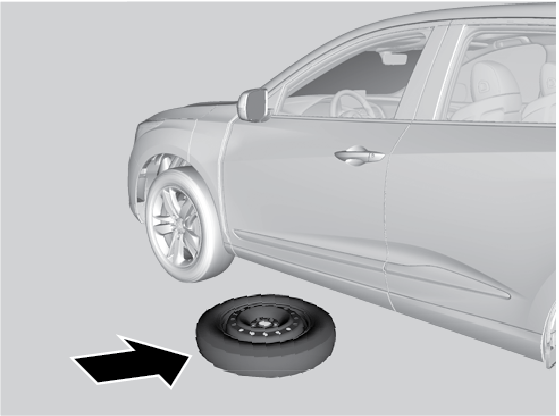
Place the spare tire (wheel side up) under the vehicle body, near the tire that needs to be replaced.
-
Loosen each wheel nut about one turn using the wheel nut wrench.
