Audio/Information Screen
Displays the audio status and wallpaper. From this display, you can go to various setup options.
- Detail
-
Touchscreen Operation
- Use simple gestures - including touching, swiping, and scrolling - to operate certain audio functions.
- Some items may be grayed-out during driving to reduce the potential for distraction.
- You can select them when the vehicle is stopped or use voice commands.
- Wearing gloves may limit or prevent touchscreen response.
You can change the touchscreen sensitivity setting.
Mode Change Switch BarYou can also select any application from the Mode Change Switch bar. Shortcuts can be edited to open other applications; but Home, Back, and Google Assistant*1 or Alexa*1 cannot be edited.
*1: On models with Google Built-In, these buttons also cannot be moved.
The power flow monitor is also displayed on the driver information interface.
While the vehicle is stationary with the engine running, the following may appear on the audio/information screen.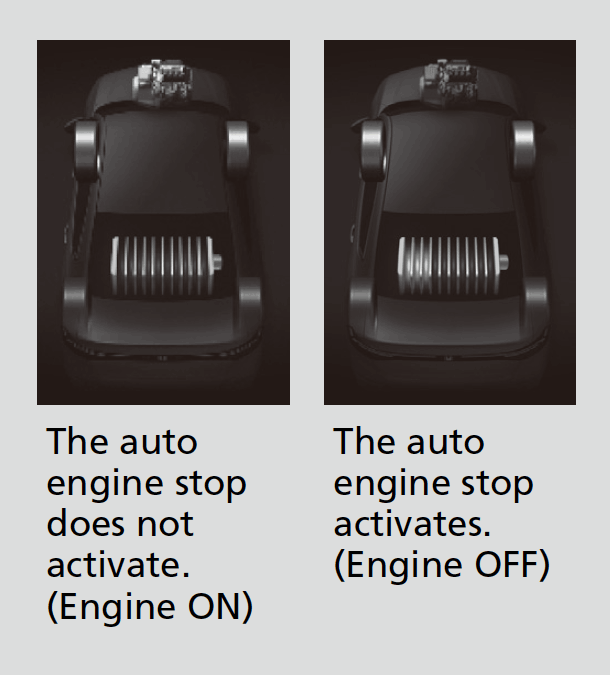 While the engine provides propulsion directly to the wheels, the
 icon appears in the power flow monitor on the screen.
A-Zone
The A-Zone is main operation area in the 12.3 inch color touchscreen.
Switching the display
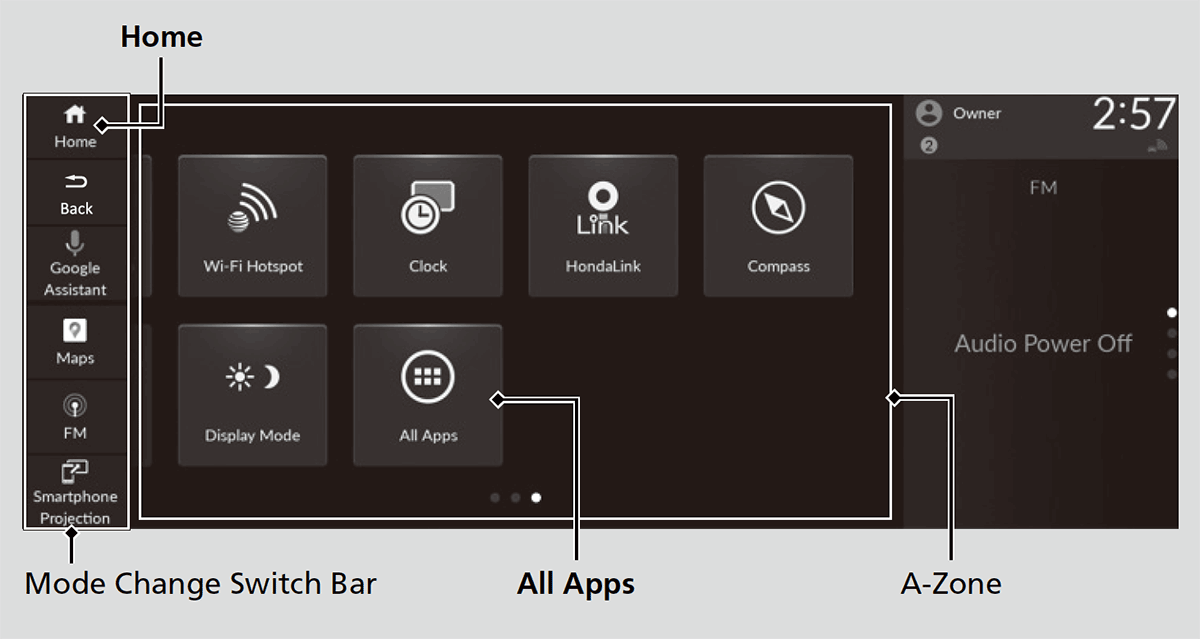
Select Home to go to the home screen.
Select the following icons on the home screen or after selecting  All Apps.
Phone
Displays the HFL information.
Bluetooth® HandsFreeLink®Using HFLHFL Menus
Trip Computer
Displays the trip computer information.
- Current Drive tab: Displays the current trip information.
- Trip A/Trip B tab: Displays information for the current and three previous drives. The information is stored every time you reset Trip A/B.
To reset the Trip A/B, select Menu, then select Delete Trip History.
To change the setting of how to reset Trip A/B, select Menu, then select “Trip A” Reset Timing or “Trip B” Reset Timing.
Clock
Displays the clock.
System Updates
Updates the software version of the audio system.
FM/AM/USB/Bluetooth Audio
Displays information for each audio format.
Profile Settings
Displays the profile settings screen or change user screen.
Vehicle Settings
Displays the vehicle settings screen.
Customized FeaturesDefaulting All the Settings
General Settings
Displays the general settings screen.
Customized FeaturesDefaulting All the Settings
Maps*
Displays the Google Maps screen.
HondaLink
Displays the HondaLink screen.
Apple CarPlay/Android Auto
Displays the Apple CarPlay or Android Auto screen.
Wi-Fi Hotspot
Displays the AT&T Hotspot screen.
Compass
Displays the compass screen.
Alexa
Displays the Alexa screen.
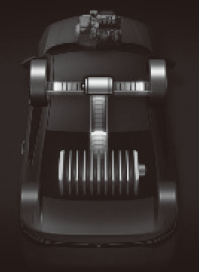
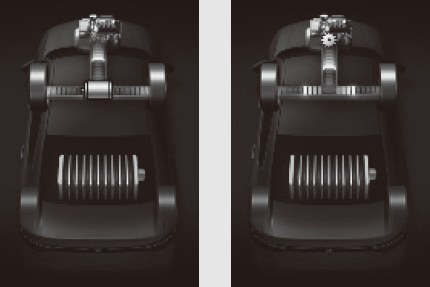
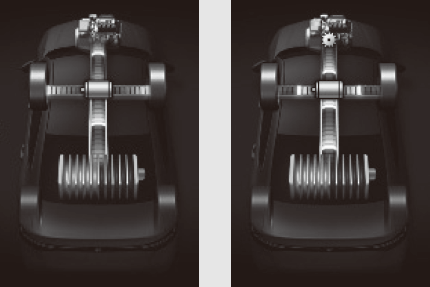
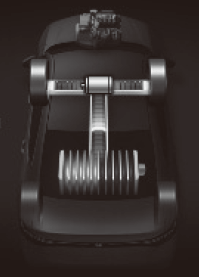
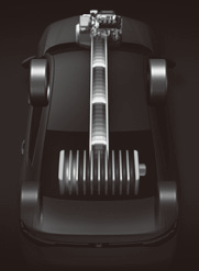
Power Flow
Displays the motor and engine power flow, average fuel economy, and range.
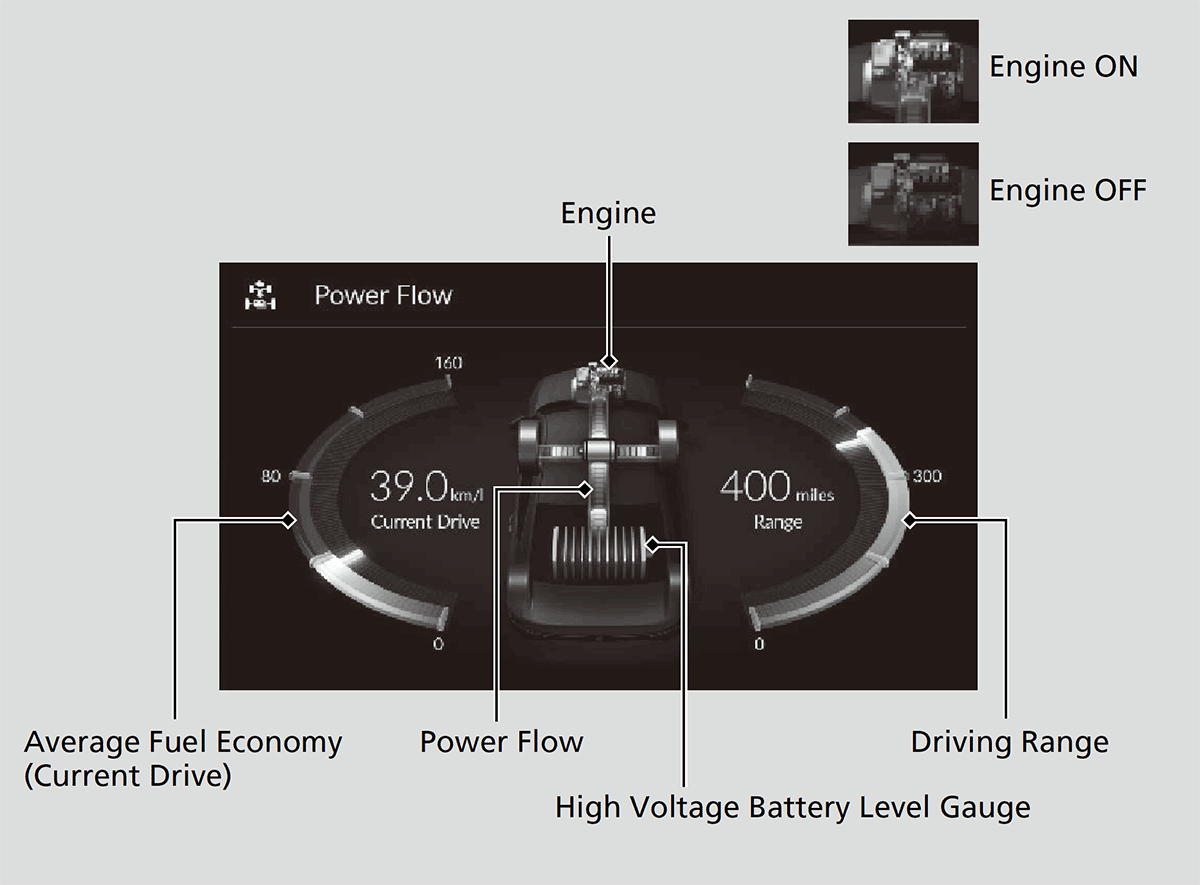
Displays the power flow, indicating what is supplying power to the vehicle and/or charging the battery.
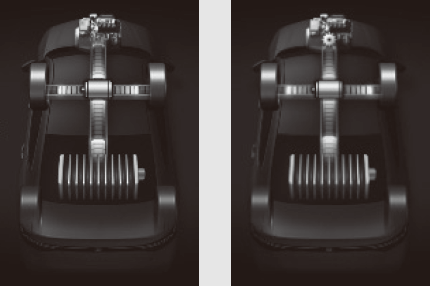
- The indicator for the power transmission appears in blue, and for the battery charging operation, in green.
|
Display
|
Color of indicators
|
Vehicle’s Condition
|
|---|---|---|
 |
Blue
|
Power is being supplied by the High Voltage battery and the engine-driven generator.
|
 |
Blue
|
Power is being supplied by the High Voltage battery.
|
 |
Blue
|
Power is being supplied by the engine-driven generator.
|
|
Display
|
Color of indicators
|
Vehicle’s Condition
|
|---|---|---|
 |
Blue and Green
|
Power is being supplied directly by the engine and the High Voltage battery is being charged by the engine-driven generator.
|
 |
Green
|
The High Voltage battery is being charged through regenerative braking.
|
 |
Green
|
The High Voltage battery is being charged by the engine-driven generator.
|
B-Zone
The B-Zone displays a card that is useful while the driver is using another application in the A-Zone.
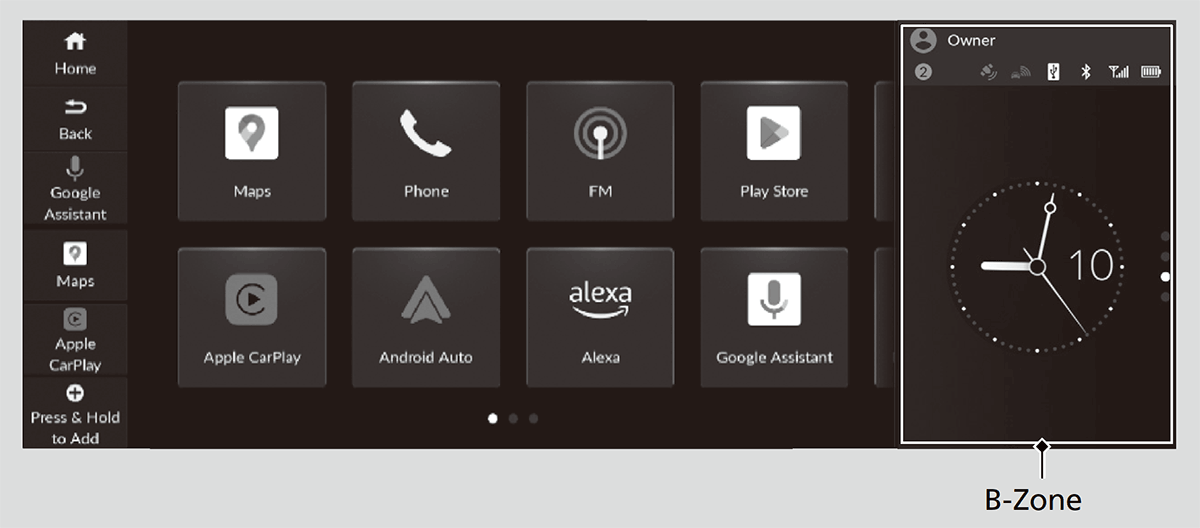
The following cards are available:
- Audio source
- Clock
- Navigation (Apple CarPlay or Android Auto)
- Compass
- Power Flow
- Suggestions from Google Assistant*1
- Depending on the OS version
- Detail
-
You can swipe up and down on the B-Zone to view a different card.
Page position is indicated at the right of the B-Zone.
Wallpaper Setup
You can change, store, and delete the wallpaper on the audio/information screen.
- Detail
-
The wallpaper you set up on Clock Faces cannot be displayed on the driver information interface.
- When importing wallpaper files, the image must be in the USB flash drive’s root directory. Images in a folder cannot be imported.
- The file name must be fewer than 64 bytes.
- The file format of the image that can be imported is BMP (bmp) or JPEG (jpg).
- Up to 21 pictures can be imported.
- The maximum image size is 4,096 × 2,304 pixels. If the image size is less, the image is displayed in the middle of the screen with the extra area appearing in black.
You cannot delete the initially imported wallpapers.
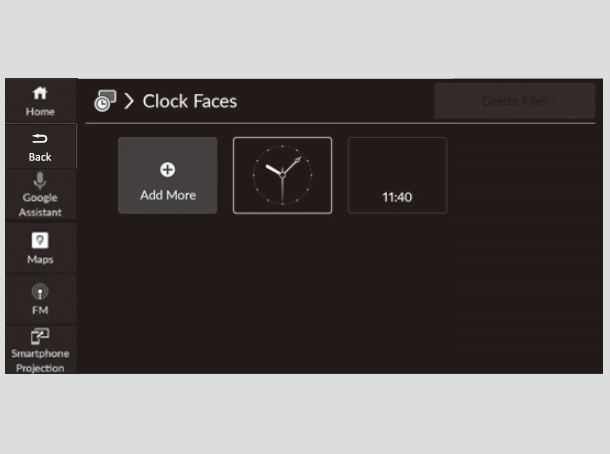
Import wallpaper
-
- Connect the USB flash drive to the USB port.
- Select Clock.
- Select Menu.
- Select Clock Faces.
- Select Add More.
-
-
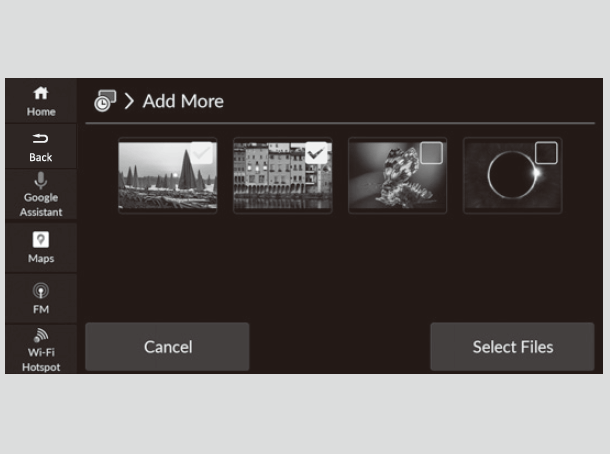
- Import a desired picture.
- Multiple pictures can be imported at the same time.
- Select Select Files.
- Select Add Files.
- The display will return to the Clock Faces screen.
- Import a desired picture.
-
Select wallpaper
- Select Clock.
- Select Menu.
- Select Clock Faces.
- Select a desired wallpaper.
- Select Save.
- The display will return to the Clock Faces screen.
Delete wallpaper
- Select Clock.
- Select Menu.
- Select Clock Faces.
- Select Delete Files.
- Select Select Files to Delete.
- When you want to delete everything wallpaper. Select Delete All Files.
- Select a desired wallpaper.
- Select Select Files.
- Select Delete Files.
- The display will return to the Clock Faces screen.
Home Screen
- Detail
-
The home screen has 3 pages. You can add up to 6 pages.Select Home to go directly back to the first page of the home screen from any page.
To move to the next screen
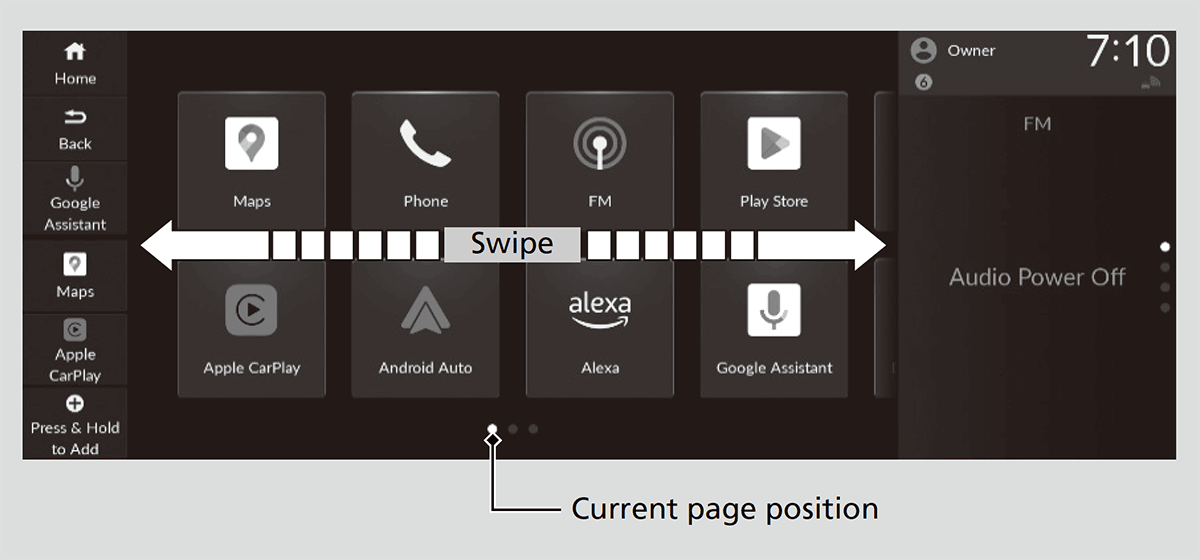
Swiping the screen left or right changes to the next screen.
To add/remove app icons on the home screen
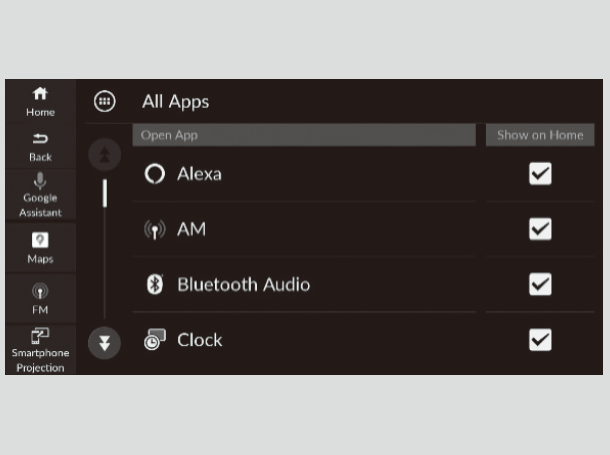
App icons can be added or deleted on the home screen.
-
- Select Home.
- Select All Apps.
- Select an app to check or uncheck them.
-
- Detail
-
Pre-installed apps may not start up normally. If this occurs, you need to reset the system.
If you perform Factory Data Reset, it may reset all the settings to their factory default.
In case those apps still do not start up normally even after Factory Data Reset, contact your dealer.Apps will not be deleted by deleting the icon on the home screen.
To move icons on the home screen
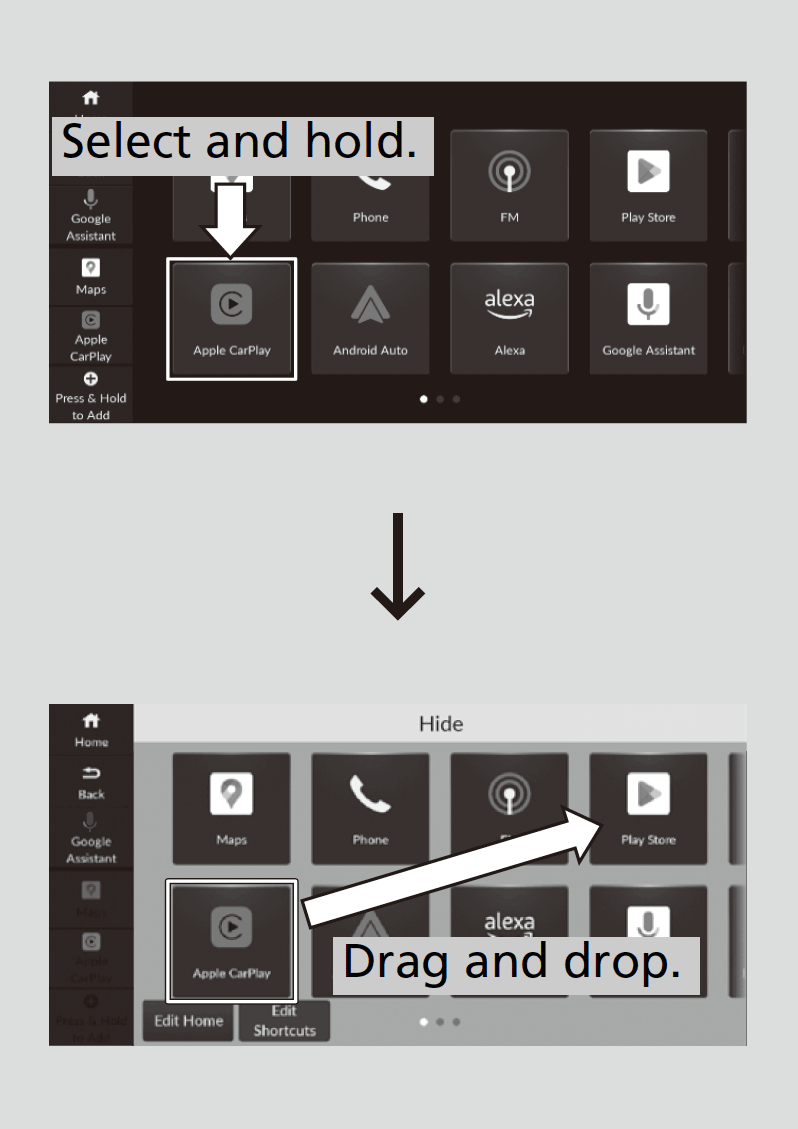
You can change location on the home screen.
-
- Select and hold an icon.
- The screen switches to the customization screen.
- Drag and drop the icon to where you want it to be.
- Select Home or Back.
- The screen will return to the home screen.
- Select and hold an icon.
-
- Detail
-
Select Tips to show tips. To hide them, select it again.
To remove icons on the home screen
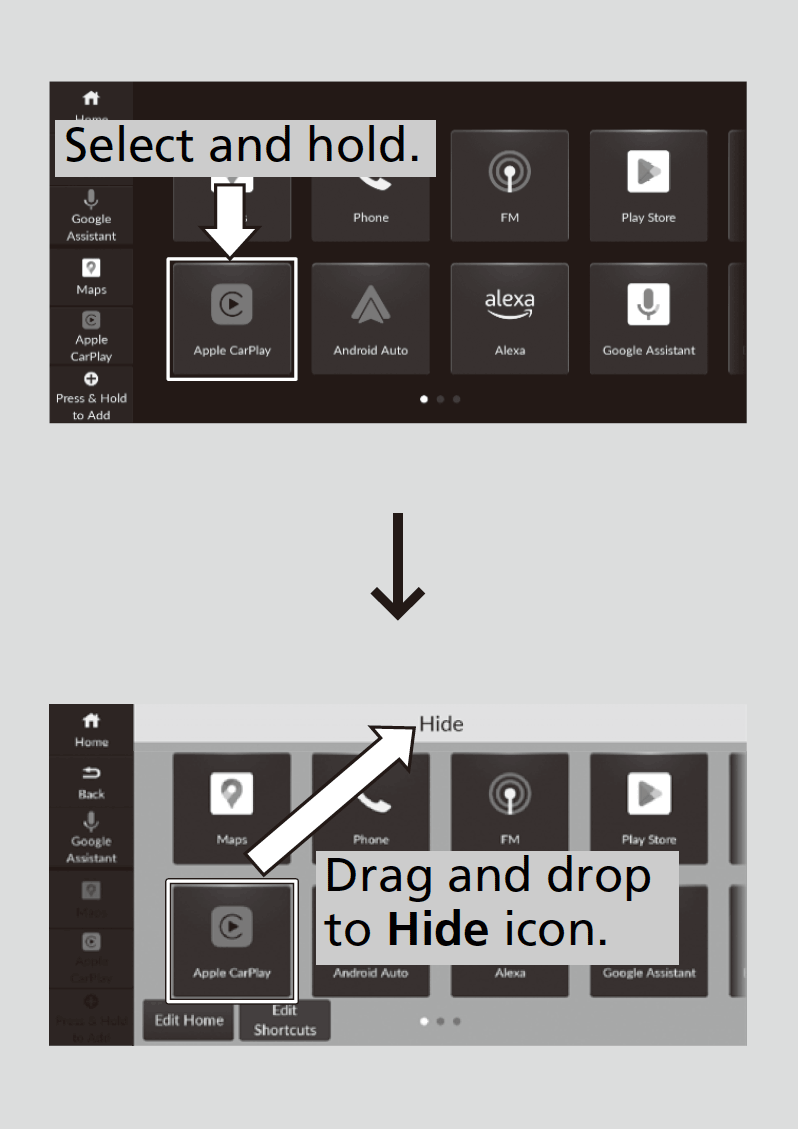
You can delete the icons on the home screen.
-
- Select and hold an icon.
- The screen switches to the customization screen.
- Drag and drop the icon you want to remove to the Hide icon.
- The icon is removed from the home screen.
- Select Home or Back.
- The screen will return to the home screen.
- Select and hold an icon.
-
- Detail
-
Apps will not be deleted by deleting the icon on the home screen.Select Tips to show tips. To hide them, select it again.
To shortcut icons on the home screen
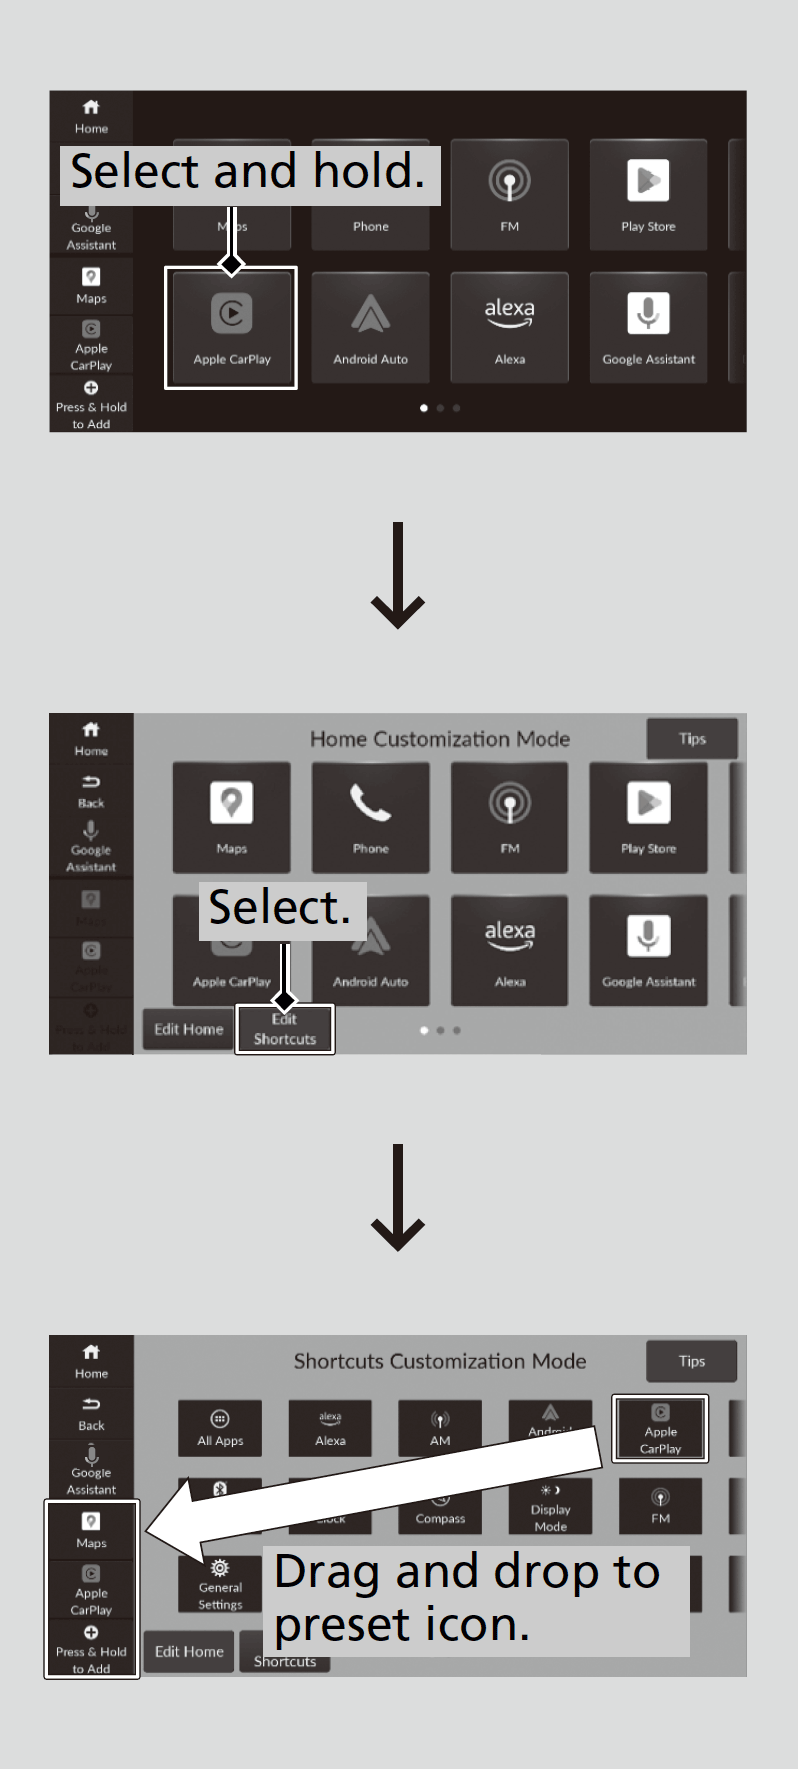
You can store up to three*1 or four icons on the mode change switch bar.
-
- Select and hold an icon.
- The screen switches to the customization screen.
- Select Edit Shortcuts.
- Drag and drop the icon you want to store to the left of the home screen.
- The icon is stored as a shortcut.
- Select Home or Back.
- The screen will return to the home screen.
- Select and hold an icon.
-
- Model with Google Built-In
- Detail
-
Select Tips to show tips. To hide them, select it again.You can also to shortcut icons on the home screen the following procedure.
-
Select and hold an icon.
-
Select Edit Shortcuts.
-
Select an icon.
-
Select shortcut location.
-
Select Home or Back.
-
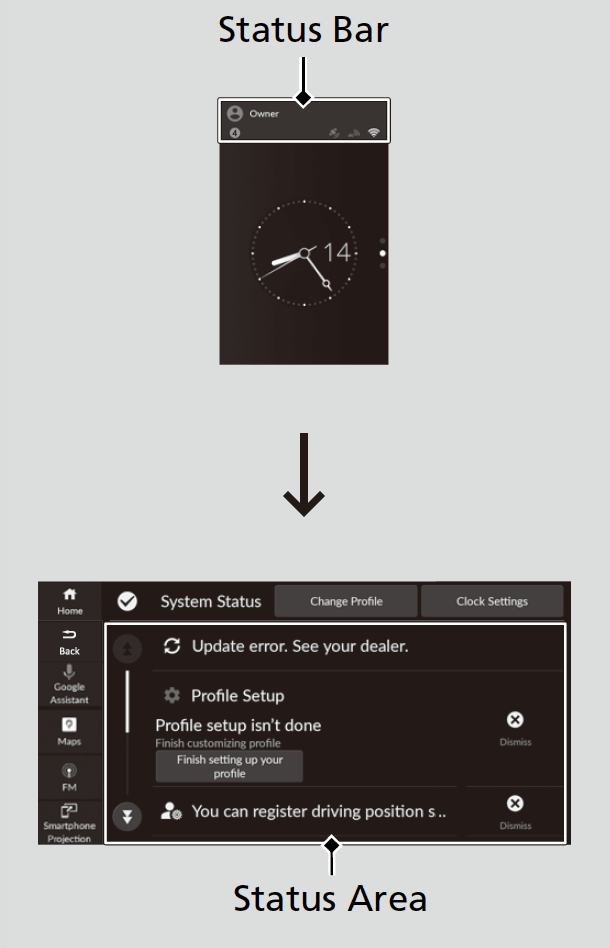
Status Bar
-
- Select the system status bar.
- The status area appears.
- Select an item to see the details.
- Select Home or Back.
- Select the system status bar.
-
* Not available on all models
- Recommended topic(s)

